To create products that will capture the hearts and minds of users, you first need to break through the technology barrier.
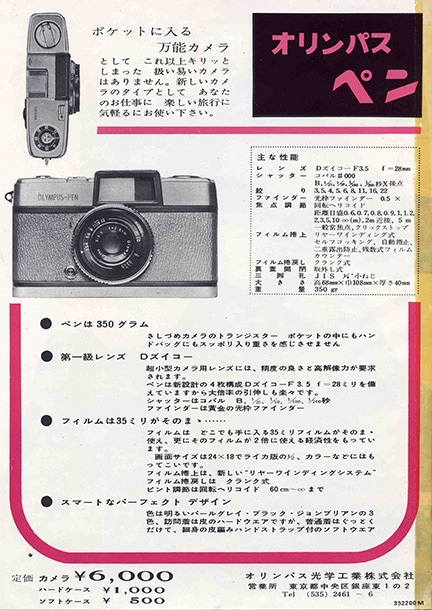
Olympus Pen catalog
When I designed the Pen, I worked alone. Now I had a staff of about 100. But 100 people giving 100 percent will not result in a hit product. To create technology that will spawn hit products, you need people who will give 120 percent.
If people think they are merely making something smaller, they will only give 80 percent, and in the end they will start to say that the task is impossible. That's the technology barrier. Our goal was to create a small camera, but how small? In advertising, you announce that your product is the world's smallest, even if you've only reduced the size by a millimeter or a gram. As a camera user, I looked at the problem from the user's perspective. I realized that it was meaningless to reduce the size by one or two millimeters, since the difference would only be apparent if you measured the camera with a ruler. Basically, you perceive the size of a camera by holding it in your hand. I wanted to achieve a big enough reduction in size and weight that people would realize that the camera was smaller and lighter than one they'd held in their hands a month earlier.
The designers said that they wanted more specific figures, so I told them that the camera wouldn't feel smaller unless the size was halved! It was simple to say "reduce it by half," but that was an extremely difficult goal. People would complain about the size and weight of SLRs without thinking, but the people who designed those cameras worked hard to make them as light and small as possible, and produced the SLRs that were on store shelves in those days. As you might expect, people said it was unreasonable to demand a half-size reduction.
The heaviest SLR in those days was the Nikon, which weighed about 1.4 kilograms. Half of that is about 700 grams. I also wanted to halve the total volume, which meant reductions of about 20 percent in both height and depth. Those targets brought screams from our design staff - of course it was unreasonable! They told me it was impossible, and it was! I realized that I had set unreasonable targets when I dismantled a camera. If we made it smaller it would be weaker. And a weaker camera would not be suitable for the full-featured SLR that I wanted to create.
The path to a compact SLR would require the efficient use of underutilized space.
One problem was the development of an alternative finder, and another was durability. The question was how many times the camera could be used. An expensive camera was good for 10,000 shots, but I wanted to increase that to 100,000. Naturally, the designers who were given this task were daunted. However, we had to do it somehow, because management had finally approved the concept after a year of deliberations.

The interior of an SLR is not all crowded; there are crowded areas and empty areas. The crowded areas are those containing the core functions, such as advancing the film, releasing the shutter and changing the shutter speed. These areas can be likened to the central administrative district of a big city, like the Kasumigaseki district in Tokyo. Nowadays we have digital cameras, and the signals simply pass through wires, but in those days everything was mechanical. All the signals had to be connected, so these areas were very crowded.
Around this time the Japanese government was talking about relocating Japan's capital functions away from Tokyo. This gave me the idea of relocating some of the core functions in the camera. But where could we put them? The area beneath the mirror was furthest away from the core functions, but it would be extremely difficult to move the functions there. It would have been simple with today's electronic technology, but everything was mechanical back then, and all the mechanisms had to be connected.
My first idea was to find underutilized areas in the camera and relocate some of the functions to those areas. However, those spaces were underutilized for a reason! We couldn't connect the functions. We found that by using a central drive shaft running from the top of the camera to the bottom we could transmit the driving force, even in those underutilized spaces. However, some functions, such as shutter speed adjustment, couldn't be moved. To relocate the shutter speed control, we would have had to put the dial on the bottom of the camera, which would have created many problems: the photographer would have had to turn the camera upside down to adjust the speed, and the dial would have been inaccessible when the camera was on a tripod. However, there was space, and we had reached a decision that functions should be relocated to that space. It was not difficult to move the strength controls. The problem was the linkage between the shutter speed and other controls. The method that we devised to move things from the bottom of the camera to the top was to place the shutter dial on the front of the camera. That was the only solution, and so that is what we did. Only the OM had a shutter speed dial in that location.
You use your left hand to set the aperture, shutter and distance, so this position is actually more ergonomic. That's how we created the camera. We decided to put the shutter dial on the lens mount, and then the underutilized space suddenly became as busy as the Ginza!
When I proposed this design, someone who knew cameras well told me that there were two types of SLR: the lens shutter type and focal plane type, and that the focal plane type was seen as a high-end camera and the lens shutter type as a rather cheap version. In a lens shutter camera, the shutter is in front, and of course the aperture and shutter are positioned around the lens. He said that our camera would be mistaken for a cheap lens shutter type and would not sell.
It's difficult to break through the barrier of accepted wisdom. However, we were able to make so much progress with the design because originally there was nothing in the underutilized space in the camera. In the upper part of the camera there was a battle for spaces measured in tenths of a millimeter. In the lower part there was nothing, which meant that while the camera itself would be smaller, its parts could be bigger and stronger. So the concept of using underutilized spaces was our first step on the road to developing a compact SLR.
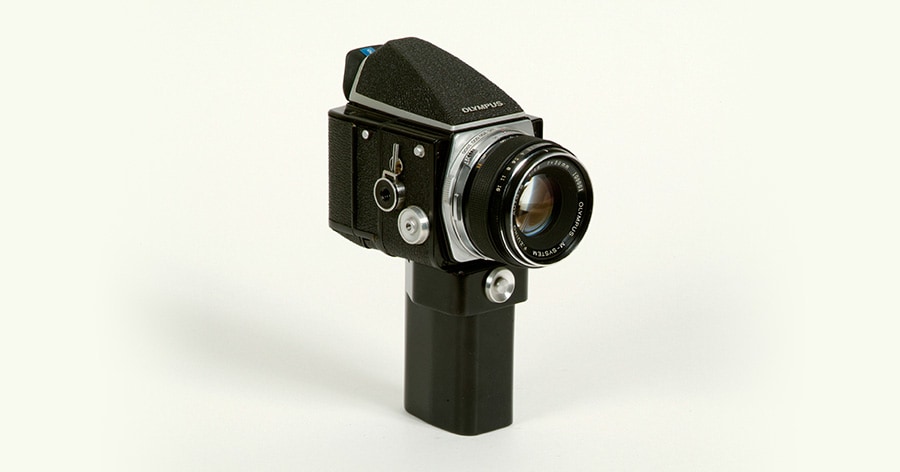
The MDN Prototype was the first Olympus SLR designed to be part of a full-featured system.
A prototype camera called the "MDN" was displayed in an Olympus camera show. Most people think that the OM-1 was the first Olympus SLR, but in fact the MDN preceded it. Our aim with the MDN was to create a camera that would make people think about what truly makes a full-featured system SLR. We applied a one-function, one-unit concept. The film was in a single film pack, and the shutter provided just the focal plane shutter function. The mirror was just a mirror and had just one function. The user could combine the desired functions to create a single camera. This is not the concept of the SLR camera. We were trying to create a full-featured system camera, even with a lens shutter. The relocation of functions made that possible, and the result was the MDN.
typical MDN setup
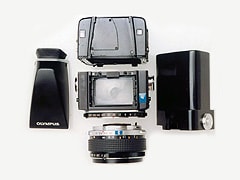
MDN unit
However, when you try to design a system that can be put together in any configuration, it becomes extremely difficult to design the mounts used to connect the items. This is because you must be able to connect everything mechanically even though not all units have mounts attached to them. You can't begin until all the units have been designed. That's because people ask you to make changes to different parts during the design process. These repeated changes culminated in the MDN, which is now on display as part of the Olympus exhibit in the JCII Camera Museum. All this took a lot of time, and of course the sales people wanted the camera immediately, saying they couldn't wait.
The M system was a full-featured, multifunctional camera system. Yet we also saw a cheap, mass-market camera as one of the units in that system. Three units would be combined to create a single system. Though there would be less freedom in the way the units were combined, costs would be lower. This was the MDS. The "N" in MDN stands for "normal," and the "S" in MDS for "simple". It was included in this system as the unit most geared toward the mass-market. However, I was focused on designing the MDN as a full-featured system camera, and was not involved in designing the MDS. But I was told that time was short, and so it was decided that this unit, which we had intended to design last, would be produced first. The MDS was made as a test camera for this purpose. "M" is the first letter of the name of someone you all know! Nobody objected. The "D" stands for "dark box" and the "S" for "simple." So the product that we had envisaged as a mass-market camera was made first. That was the first M-1.
However, every manufacturer had tried to develop smaller SLRs, and I was asking the production staff to do something that others had been unable to do. It was a challenge for the designers as well as for those in production. They wanted us to add 1 millimeter here and 3 millimeters there. There was a battery compartment in the bottom of the camera, and we wanted to insert packing to make it at least splash-proof, if not waterproof, but there was not enough space. When I yielded and gave them 1 millimeter, they immediately produced a design. They were so happy! People were competing for millimeters of space. For example, we had used a millimeter for the lever on the side. Then the lens people said that they produced a design that would eliminate the need for that millimeter. It was really annoying. I told them to go back to the dimensions that I had originally approved, but they said they couldn't. They said the battery compartment was fine, but that we couldn't revert to the original dimensions.
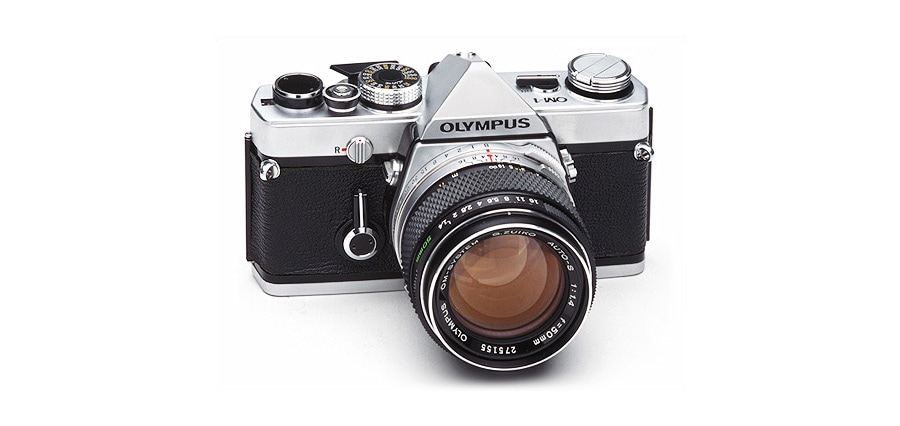
M-1(OM-1)
So the camera we have now is a millimeter taller than the dimensions that I first approved! That's how we did things.
